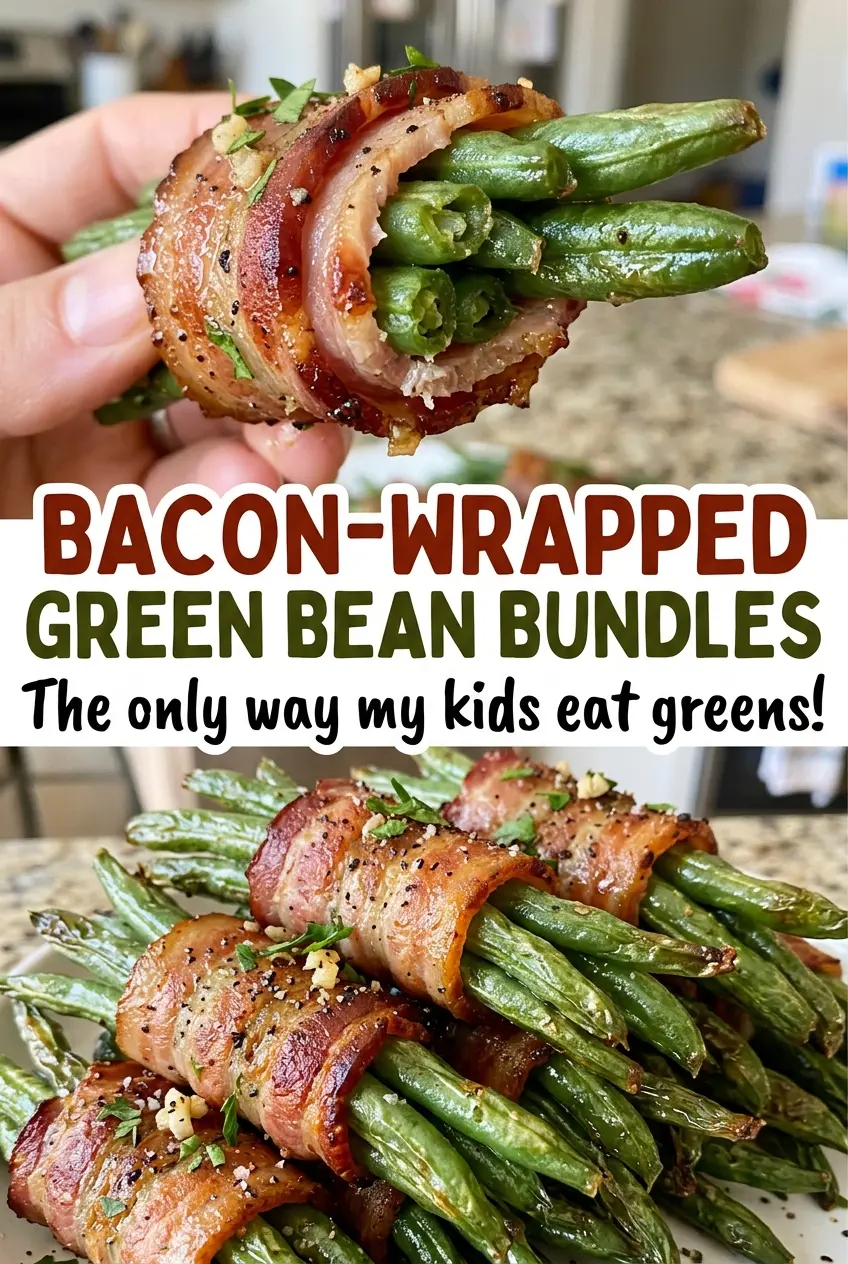
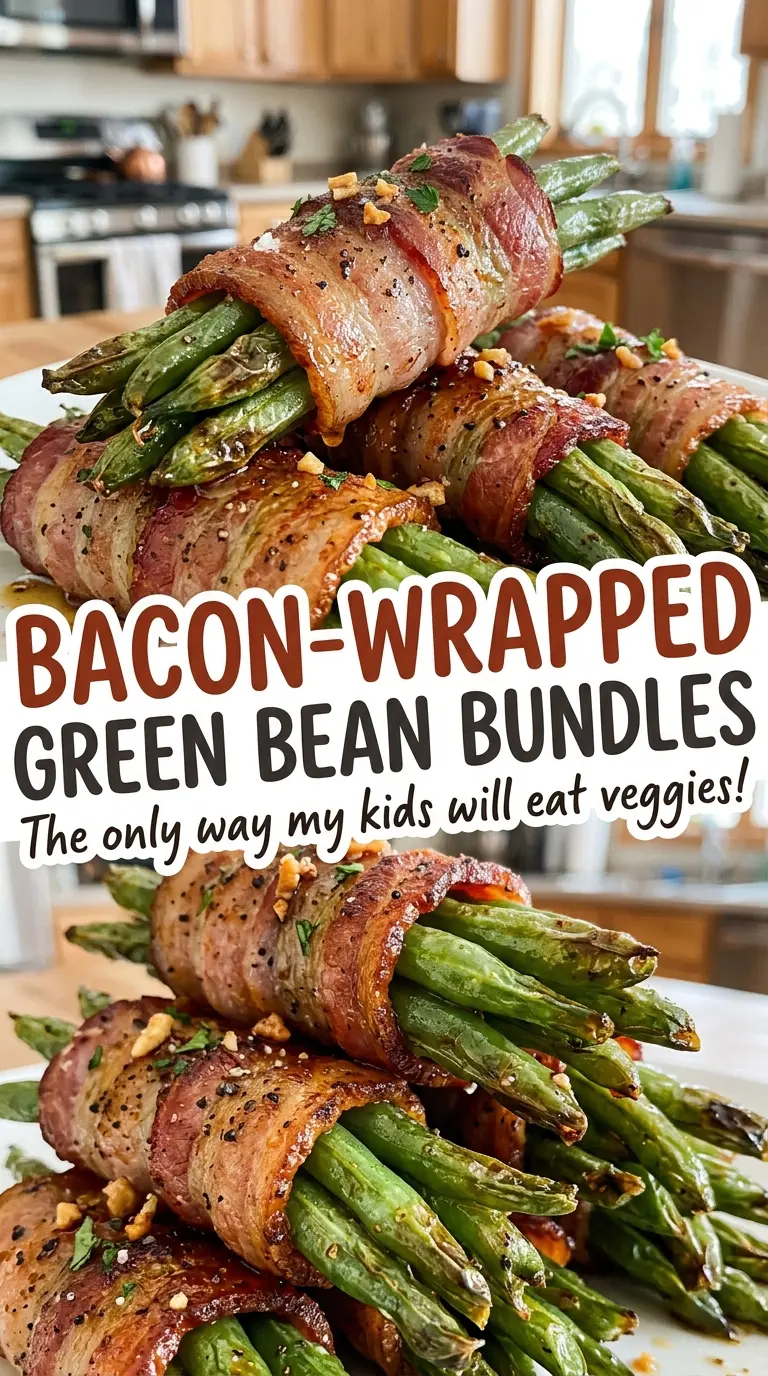
The green beans turn bright green within minutes of hitting boiling water, but they still need a little bite before they’re ready for the oven. I learned that fully soft beans don’t hold their shape as neatly once they’re wrapped, and the second bake gives them more time to cook. These bacon-wrapped green bean bundles start with a quick blanch, then finish under a buttery brown sugar glaze.
Blanching first gives the beans a head start without asking the bacon to stay in the oven long enough to overcook. I also pat the beans completely dry before wrapping; water clinging to them can make the bacon less crisp and the glaze less clingy. The glaze takes just a few minutes on the stove, and it bubbles around the bundles as the bacon browns. You end up with tender green beans tucked inside crisp-edged bacon and a sweet-savory coating.
Kitchen Note
Stop cooking the bacon while it’s still flexible. If it gets crisp in the skillet, it’s harder to wrap around the beans and can crack before it reaches the oven.
Save these bacon-wrapped green bean bundles for a dinner spread with crisp bacon and a buttery brown sugar glaze.
Why Drying the Beans Matters as Much as Blanching Them
A quick blanch does more than brighten the beans. It starts cooking them before they’re bundled, so the short oven finish can brown the bacon without leaving the centers raw or tough. Pull them from the water while they’re still crisp-tender; they’ll soften further as the bundles bake.
Drying is the part that’s easy to rush. Water on the bean surfaces turns to steam in the oven, and that extra moisture gets in the way of crisp bacon and an even glaze. Drain the beans, then pat them until no damp sheen remains. This small pause makes a noticeable difference when the brown sugar glaze hits the hot bundles: it coats the bacon rather than sliding off with moisture. The goal isn’t to dry out the beans inside, just to remove water from the outside.
Why Fresh Beans and Regular-Cut Bacon Make These Bundles Easier to Get Right
- Fresh green beans — Their firm texture makes them easier to gather into tidy bundles, and they keep a pleasant bite after blanching and baking. Choose beans that feel crisp rather than limp; trim the ends before cooking.
- Regular-cut bacon — This thickness has time to brown in the oven while the beans finish cooking. Thick-cut slices need longer to crisp and can leave the beans overdone before the bacon is ready.
- Light brown sugar — Its molasses notes bring sweetness and help the glaze brown. Packed brown sugar also blends easily with the melted butter; a dry, hardened lump won’t stir into a smooth coating as readily.
- Unsalted butter and soy sauce — Unsalted butter lets the soy sauce provide the savory, salty edge without making the glaze taste overly salty. Use a soy sauce you already enjoy; the amount is small, but its savory flavor comes through.
- Garlic powder — It disperses evenly through the butter glaze, unlike fresh garlic pieces that can brown quickly in the oven. Keep it with the brown sugar and soy sauce so every bundle gets a little seasoning.
How to Build the Bundles Before the Glaze Goes On
Blanch the beans until bright and crisp-tender
Heat the oven to 400°F and line a rimmed baking sheet with foil. Bring the water and kosher salt to a boil in a 4-quart pot, add the trimmed green beans, and cook for 3 to 4 minutes. Look for a vivid green color and beans that bend slightly but still have a little resistance when you bite one. Drain them well and pat completely dry before moving on.
Render the bacon so it still bends
Set a 12-inch skillet over medium heat and cook the bacon for 4 to 5 minutes, turning once. You’re looking for some fat to render while the slices remain pliable, not crisp. Transfer the bacon to paper towels to drain. If a slice feels stiff when you lift it, handle it gently as you wrap so it doesn’t split.
Wrap eight even bundles
Divide the beans into 8 bundles, with about 8 to 10 beans in each. Wrap one bacon slice around each bundle and set it seam-side down on the foil-lined baking sheet. Keep the bundles similar in size so they bake at the same pace. Bake at 400°F for 15 minutes; the bacon will begin to brown, but it still needs the glazed finish.
Brush on the glaze for the final bake
While the bundles bake, melt the butter in a small saucepan over low heat. Stir in the brown sugar, soy sauce, and garlic powder, then cook for 1 to 2 minutes until combined. Brush the glaze over the bundles after their first bake and return the pan to the oven for 8 to 10 minutes. They’re ready when the bacon is browned and crisp and the glaze is bubbling around the edges.
Two Simple Ways to Adapt the Glaze
Make the glaze gluten-free with tamari
Replace the soy sauce with the same amount of gluten-free tamari. The glaze keeps its savory balance, though tamari may taste a little fuller; choose a gluten-free product if you’re avoiding gluten.
Use maple syrup for a softer, less caramel-like coating
Swap the packed light brown sugar for an equal volume of pure maple syrup. The glaze will be a little thinner and taste more maple-forward, with less of the caramel-like finish brown sugar gives the bacon.
Storage and Reheating
- Refrigerator: Keep leftovers in an airtight container for 3 to 4 days. The beans stay tender, but the bacon softens.
- Freezer: Freeze in an airtight container for up to 2 months. The beans will be softer after thawing, and the bacon won’t be as crisp as it is fresh.
- Reheating: Reheat on a baking sheet in a 350°F oven until hot throughout, checking for 165°F in the center. The microwave warms them quickly but softens the bacon further.
Questions That Come Up When Making Green Bean Bundles
Bacon-Wrapped Green Bean Bundles
Ingredients
Equipment
Method
- Heat the oven to 400°F and line a rimmed baking sheet with foil.
- Bring the water and salt to a boil in a 4-quart pot, add the green beans, and cook for 3 to 4 minutes until bright green and crisp-tender. Drain and pat completely dry.
- Cook the bacon in a 12-inch skillet over medium heat for 4 to 5 minutes, turning once, until some fat has rendered but the slices are still flexible. Drain on paper towels.
- Divide the green beans into 8 bundles of about 8 to 10 beans each, wrap one bacon slice around each bundle, and place seam-side down on the baking sheet.
- Bake at 400°F for 15 minutes.
- Melt the butter in a small saucepan over low heat, stir in the brown sugar, soy sauce, and garlic powder, and cook for 1 to 2 minutes until combined.
- Brush the glaze over the bundles and bake for 8 to 10 minutes more, until the bacon is browned and crisp and the glaze is bubbling.