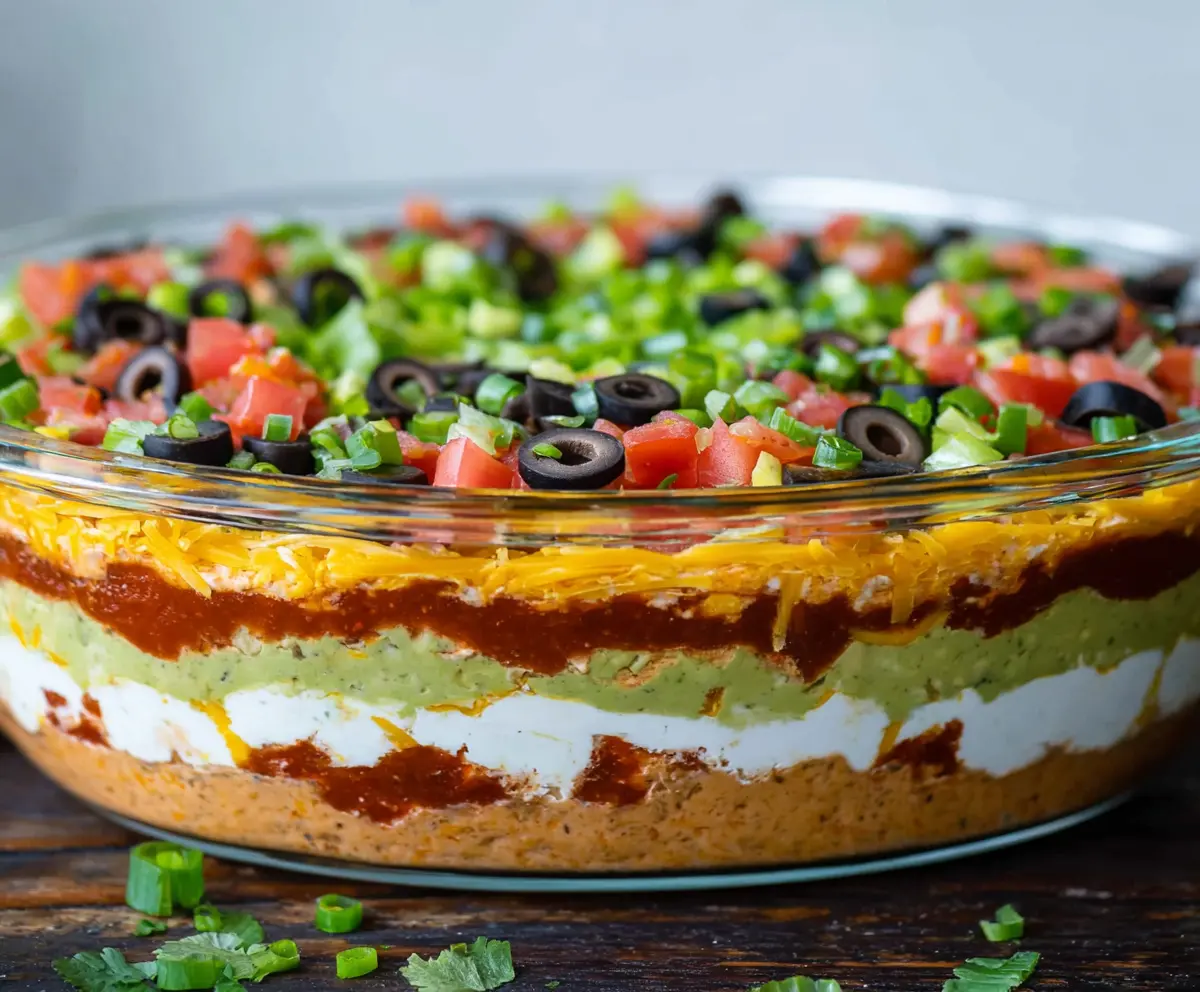
Ultimate 7 Layer Dip is a colorful, tasty dish that’s perfect for sharing. It layers classic ingredients like creamy refried beans, zesty salsa, cool guacamole, sour cream, melty cheese, fresh tomatoes, and sliced olives for a mix of flavors and textures. Each bite brings a little crunch, creaminess, and a touch of spice, making it a total crowd-pleaser.
I love making this dip when friends come over because it’s so easy to put together but still feels special. One tip I’ve found helpful is spreading the beans and guacamole evenly so each scoop gets a bit of every layer. It makes the flavors pop and keeps everyone coming back for more. Plus, it’s a fun way to show off bright, fresh ingredients that work so well together.
My favorite way to enjoy this 7 Layer Dip is with sturdy tortilla chips or even crispy veggie sticks. It’s great as a snack, party appetizer, or even a casual lunch. I’ve made it for game days and family get-togethers, and it always disappears fast. There’s just something about all those layers working together that brings people together and sparks smiles around the table.
Key Ingredients & Substitutions
Refried Beans: These add a creamy, hearty base. If you want a smoother texture, use canned beans and mash them yourself. For a vegetarian option, check labels to avoid lard or try black beans instead.
Sour Cream: It brings a cool, tangy creaminess. You can swap with Greek yogurt for a healthier twist or a dairy-free sour cream alternative if needed.
Guacamole: Fresh avocado mashed with a little lime juice is best. Store-bought works well for convenience, but homemade tastes brighter and fresher.
Salsa: Choose mild or medium depending on your heat preference. Chunky salsa adds texture, but smooth salsa works if you want it easier to spread.
Cheddar Cheese: Sharp cheddar shines here, but you can mix in mozzarella for extra meltiness or use a Mexican cheese blend for authenticity.
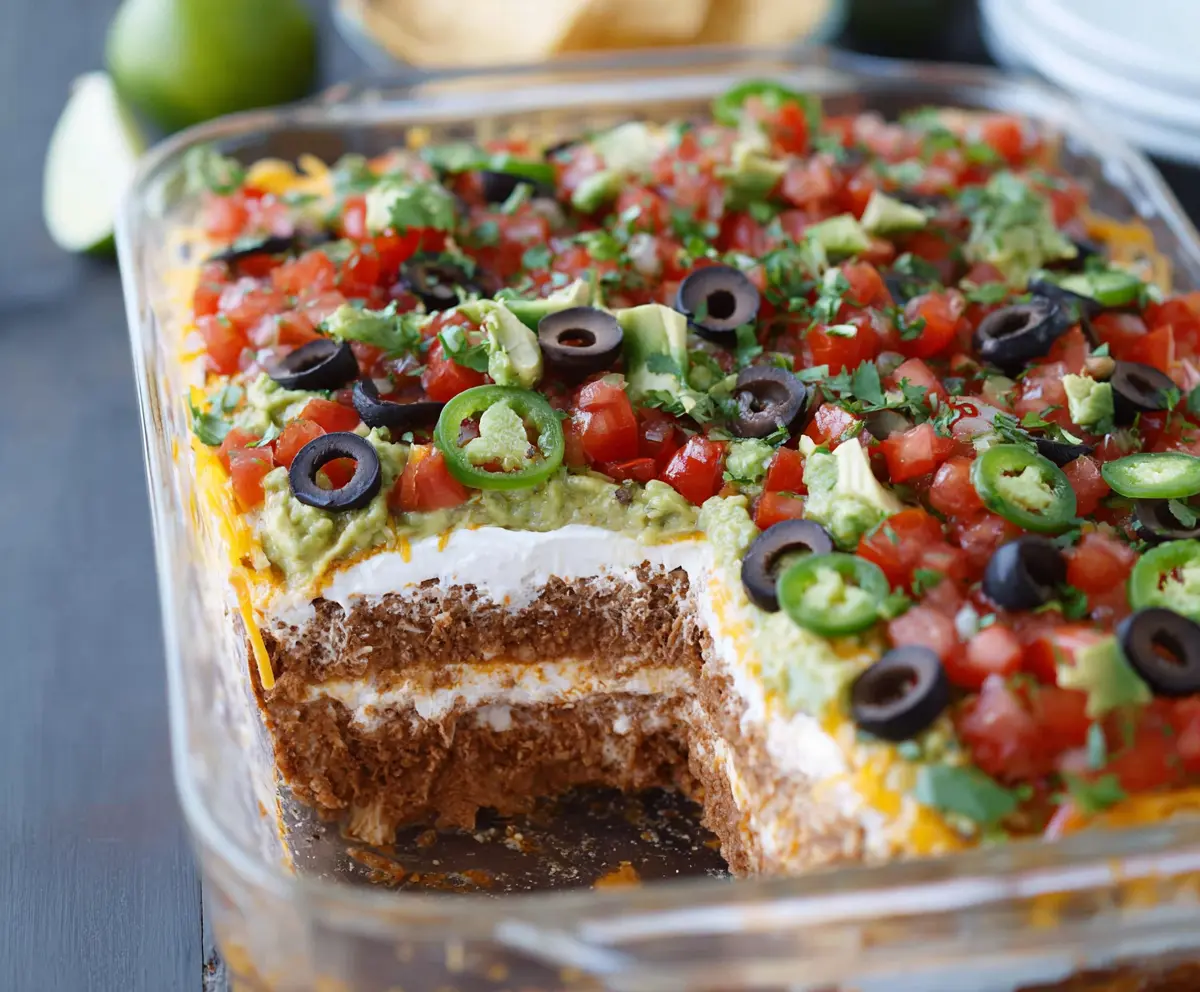
Veggie Toppings: Fresh diced tomatoes, green onions, and black olives add crunch and color. Feel free to add jalapeños if you like more spice, or swap olives for sliced pickled jalapeños for a tangy kick.
How Can I Layer the Dip for the Best Look and Flavor?
Layering is key to the dip’s eye-catching appeal and balanced taste. Follow these tips for neat, distinct layers:
- Use a clear glass dish to show off the colors.
- Spread each layer evenly and gently to avoid mixing colors.
- Be patient when layering salsa and guacamole—spoon and smooth carefully.
- Chill the dip for at least 30 minutes before serving so flavors meld and layers set up.
- Slice and dice your fresh veggies evenly for a tidy look on top.
Taking a little extra care with the layers makes the dip look tempting and helps each bite get a bit of every flavor and texture. It’s an easy way to impress guests!
Equipment You’ll Need
- 9×13-inch glass or clear plastic serving dish – it shows off the colorful layers beautifully.
- Medium mixing bowls – great for mixing beans with seasoning and preparing guacamole separately.
- Spoons or spatulas – use these to spread each layer evenly without mixing them.
- Knife and cutting board – for chopping fresh tomatoes, green onions, and slicing olives.
Flavor Variations & Add-Ins
- Swap refried beans for black bean dip for a different, slightly chunkier texture and taste.
- Add cooked, seasoned ground beef or shredded chicken between layers for extra protein.
- Use pepper jack cheese instead of cheddar for a mild spicy kick.
- Mix in diced jalapeños or a drizzle of hot sauce for extra heat if you like it spicy.
Ultimate 7 Layer Dip
Ingredients You’ll Need:
Dip Layers:
- 1 (16 oz) can refried beans
- 1 teaspoon taco seasoning mix
- 1 cup sour cream
- 1 cup guacamole (store-bought or homemade)
- 1 cup salsa (mild or medium, your choice)
- 1 1/2 cups shredded sharp cheddar cheese
- 1 large tomato, seeded and diced
- 1/2 cup sliced black olives
- 1/3 cup chopped green onions
- Optional: chopped fresh cilantro for garnish
For Serving:
- Tortilla chips
How Much Time Will You Need?
This dip takes about 15 minutes to prepare. After assembling, allow the dip to chill in the refrigerator for at least 30 minutes to let the flavors blend. Total time: roughly 45 minutes.
Step-by-Step Instructions:
1. Prepare the Bean Layer:
In a medium bowl, combine the refried beans with the taco seasoning. Stir until the seasoning is well mixed in. Spread this mixture evenly in the bottom of a clear 9×13-inch serving dish. This forms a sturdy, flavorful base.
2. Add the Creamy Layers:
Spread the sour cream evenly over the refried beans. Next, carefully layer the guacamole over the sour cream. Take your time to spread each layer gently so they stay distinct and look nice.
3. Add Salsa and Cheese:
Spoon the salsa over the guacamole layer and spread it out evenly. Then sprinkle the shredded cheddar cheese over the salsa. This will add a melty, savory flavor that everyone loves.
4. Top with Fresh Veggies:
Finish decorating the dip with diced tomatoes, sliced black olives, and chopped green onions. Distribute them evenly to add bright colors and fresh texture. If you like, sprinkle some chopped cilantro on top for extra freshness.
5. Chill and Serve:
Cover the dish with plastic wrap and chill it in the refrigerator for at least 30 minutes. This makes the flavors meld and helps the layers set. Serve your 7 Layer Dip cold with sturdy tortilla chips for dipping. Enjoy!
Can I Make the 7 Layer Dip Ahead of Time?
Yes! Prepare the dip a few hours or even a day ahead. Just cover it tightly and refrigerate to keep the layers fresh. Give it a gentle stir before serving if the layers shift a bit.
Can I Use Frozen Guacamole or Refried Beans?
You can use frozen guacamole or refried beans, but thaw them completely in the fridge overnight for best texture. Stir well before layering to avoid lumps.
What Are Some Good Substitutes for the Cheese?
If you want a different flavor, try pepper jack or a Mexican cheese blend. For a lighter option, use part-skim mozzarella or omit cheese altogether if dairy-free.
How Should Leftovers Be Stored?
Store leftovers in an airtight container in the refrigerator for up to 3 days. Before serving again, give it a quick stir to refresh the layers and serve chilled.