Get ready for a fun summer ice cream party right on your porch! You can set up a colorful ice cream bar with scoops of different flavors, sprinkles, and toppings like chocolate sauce and fruit.
Nothing says summer like enjoying yummy ice cream with friends. It’s super easy to make, and I love letting everyone create their own sundae masterpieces. It’s a scoop of joy for everyone! 🍦
Key Ingredients & Substitutions
Ice Cream Sandwiches: Chocolate or vanilla sandwiches work great. You can try different flavors to mix it up or use gluten-free ice cream sandwiches if needed.
Sprinkles: The red, white, and blue theme is perfect for summer parties! If you can’t find themed sprinkles, any colorful sprinkles or chopped nuts could work well for a fun twist.
How Do You Make Sure the Sprinkles Stick to the Ice Cream?
Getting the sprinkles to stick is key for a festive look! Here’s how to do it perfectly:
- Open the ice cream sandwiches carefully so they stay intact. A small gap helps the sprinkles adhere.
- Use a shallow dish for the sprinkles, allowing for easy pressing.
- Firmly press the sides of the sandwich into the sprinkles for better coverage.
- After decorating, freezing them for a while sets everything and enhances the flavors.
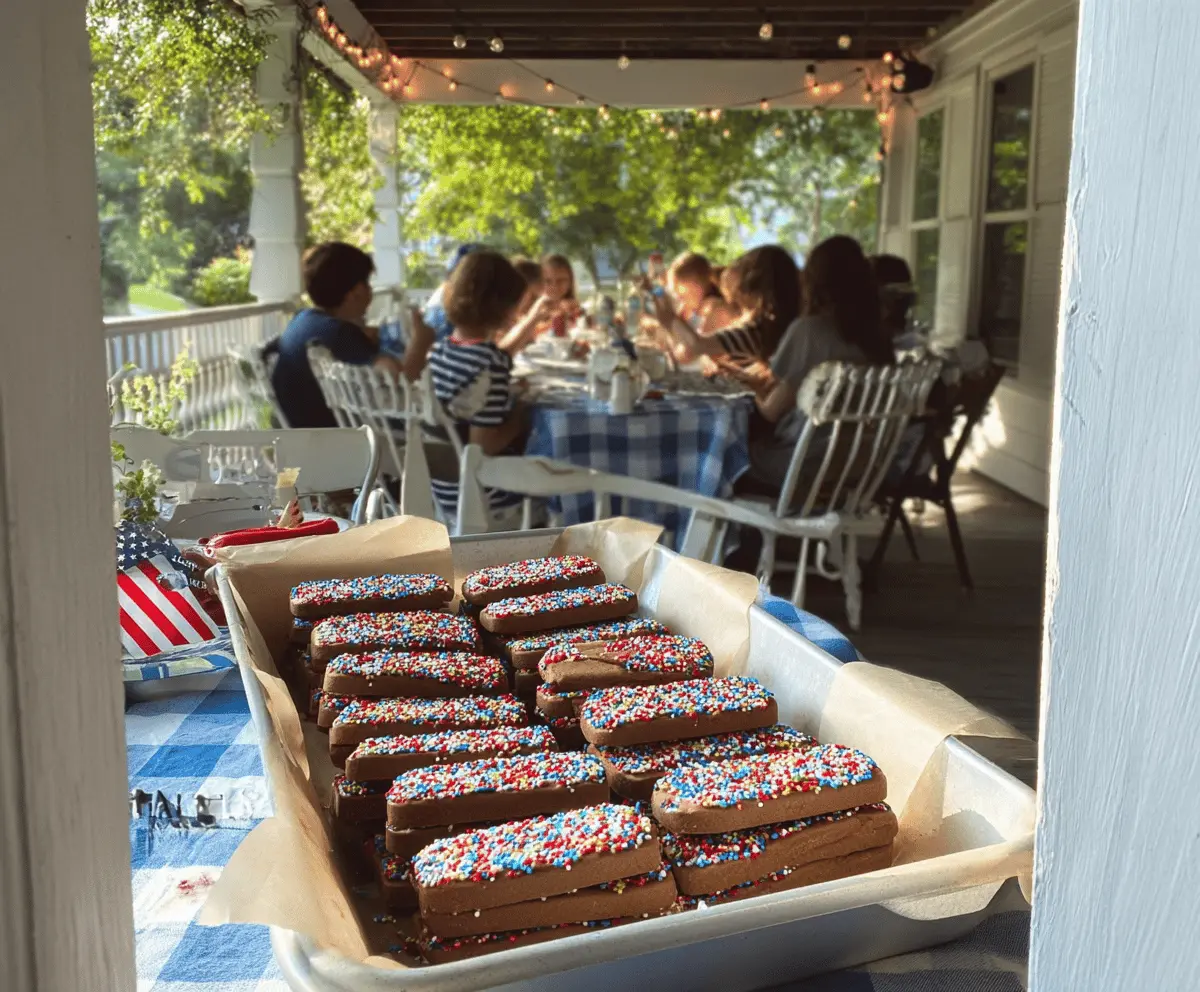
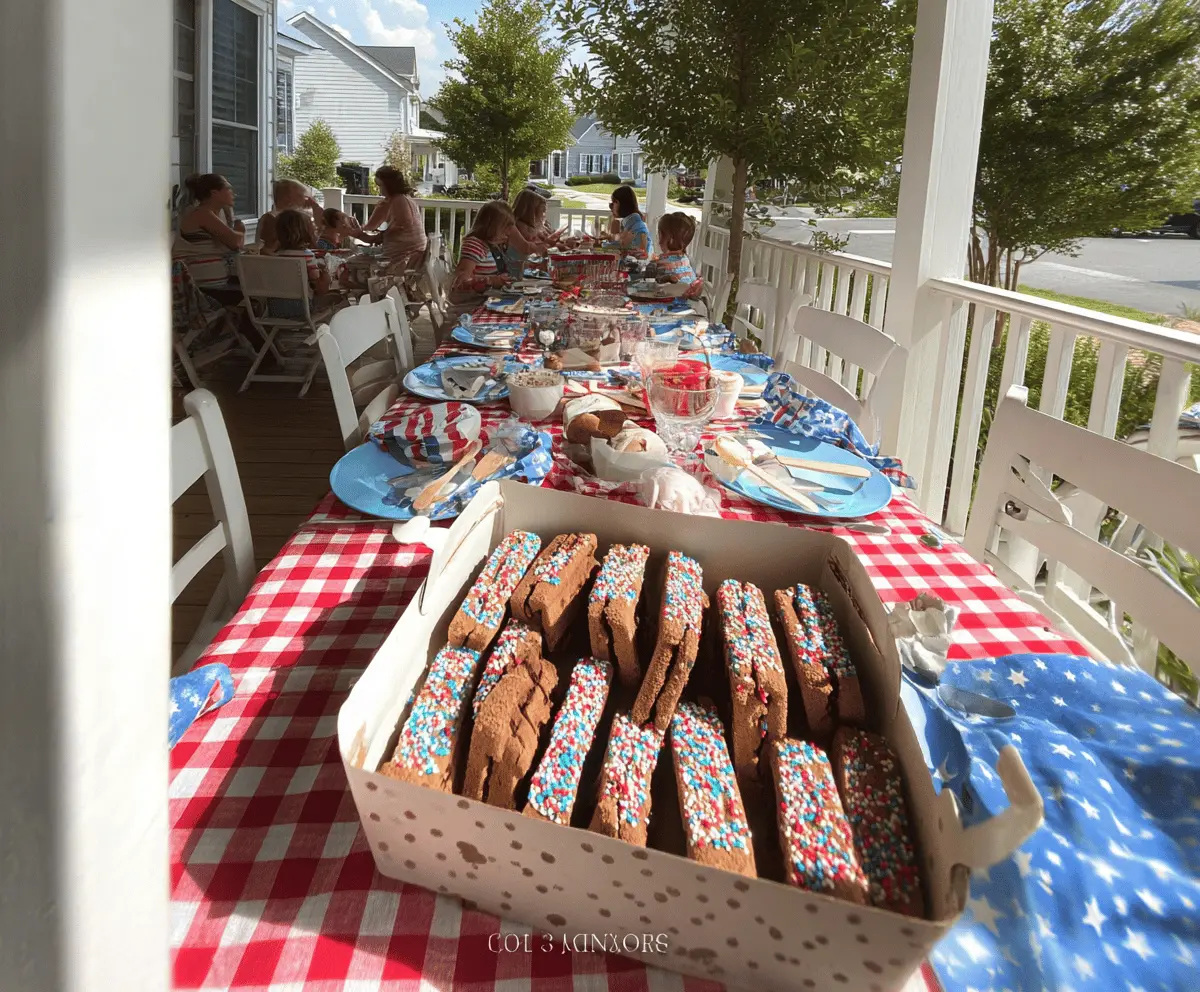
How to Make Festive Ice Cream Sandwiches with Red, White, and Blue Sprinkles
Ingredients You’ll Need:
- 1 box chocolate or vanilla ice cream sandwiches (about 8-10 sandwiches)
- 1 cup red, white, and blue sprinkles (including star-shaped and jimmies)
How Much Time Will You Need?
This simple recipe takes about 15 minutes to prepare and 30 minutes to freeze before serving. So, in just under an hour, you’ll have a fun and festive dessert ready for your summer porch party!
Step-by-Step Instructions:
1. Prepare Your Workstation:
Start by laying out all your ice cream sandwiches on a flat tray or pan lined with parchment paper. This will make handling them easier and keep things tidy.
2. Open the Ice Cream Sandwiches:
Carefully open each ice cream sandwich slightly. You want to create a small gap around the edges of the ice cream without breaking the sandwich.
3. Get the Sprinkles Ready:
Next, spoon the red, white, and blue sprinkles into a shallow dish. This shallow dish will make it easier to press the sandwich edges into the sprinkles.
4. Coat with Sprinkles:
Now it’s time for the fun part! Gently press the edges of each open ice cream sandwich into the sprinkles. This will coat the ice cream with a colorful, festive finish.
5. Place Them Back:
Once decorated, place the ice cream sandwiches back onto the tray. Keep them lined up; they look great and are ready for freezing!
6. Freeze for Firmness:
Pop the tray of decorated sandwiches into the freezer for at least 30 minutes. This will help set the sprinkles to the ice cream and make them easy to handle when serving.
7. Serve and Enjoy:
After freezing, take the sandwiches out and serve them chilled to your guests. Everyone can enjoy their own festive treat while soaking up the summer sun! Perfect for a fun, relaxing day on the porch.
This recipe is great because it’s mess-free and lets everyone customize their own desserts, making it a hit for kids and adults alike at your summer ice cream party!
FAQ for Festive Ice Cream Sandwiches with Red, White, and Blue Sprinkles
Can I Use Different Ice Cream Flavors?
Absolutely! Feel free to mix and match ice cream sandwich flavors to create new combinations. Vanilla and strawberry or mint and chocolate can add a fun twist to your party.
What Can I Substitute for the Sprinkles?
If you can’t find red, white, and blue sprinkles, no problem! Use any colorful sprinkles you have on hand, or try crushed nuts, cookie crumbles, or edible glitter for a fun effect.
How Do I Store Leftover Ice Cream Sandwiches?
Store any leftover decorated ice cream sandwiches in an airtight container in the freezer. They can last for up to 2 weeks, but they’re best enjoyed within a few days for optimal freshness!
Can I Make These Ahead of Time?
Yes, you can prepare the ice cream sandwiches a day in advance! Just keep them frozen until party time, then serve them chilled for a refreshing treat that’s ready in seconds.