This Easy Ninja Creami Chocolate Peanut Butter Ice Cream is a dream come true for chocolate and peanut butter lovers! It’s creamy, rich, and has a delightful blend of flavors that make every scoop a treat.
I can’t resist making this ice cream! It’s so simple to whip up, and the combination of chocolate and peanut butter makes it hard to stop at just one bowl. Enjoy it on warm days or cozy nights! 🍦
Key Ingredients & Substitutions
Whole Milk: This gives the ice cream its creamy texture. If you’re looking for a lighter version, you can use 2% milk, though the ice cream might not be as rich.
Heavy Cream: This adds richness and creaminess. For a lighter option, you could replace some of it with more milk, but keep in mind that the texture will change.
Granulated Sugar: Use this for sweetness. If you want a healthier option, you can try honey, maple syrup, or a sugar substitute, but the sweetness level may vary.
Cocoa Powder: Unsweetened cocoa is essential for that chocolate flavor. For a sweeter touch, look for Dutch-processed cocoa powder, which is less bitter.
Peanut Butter: Smooth peanut butter is easily mixed in, while crunchy adds texture. If you’re allergic, almond or sunflower seed butter can work as a substitute.
Vanilla Extract: This enhances the flavor. If you don’t have vanilla, a pinch of vanilla bean or in a pinch, you can skip it altogether.
How Do You Get the Creamy Texture Without Ice Crystals?
The key to a smooth and creamy ice cream is the chilling and freezing process. Here are some tips to avoid ice crystals:
- Ensure your mixture is well chilled before freezing it in your Ninja Creami. Aim for at least 4 hours in the fridge, or overnight for best results.
- Use the Ice Cream mode in the Ninja Creami for optimal texture. If your first spin is crumbly, don’t hesitate to re-spin it for a smoother finish.
- Make sure the mixture stays at or below the max fill line in the container, since overfilling can cause uneven freezing.
By following these tips, you’ll achieve a delightful, creamy chocolate peanut butter ice cream that’s perfect for any occasion!
Easy Ninja Creami Chocolate Peanut Butter Ice Cream
Ingredients You’ll Need:
- 2 cups whole milk
- 1 cup heavy cream
- 3/4 cup granulated sugar
- 1/2 cup unsweetened cocoa powder
- 1/4 teaspoon salt
- 1/2 cup peanut butter (smooth or crunchy, your choice)
- 1 teaspoon vanilla extract
- Optional toppings: extra peanut butter for drizzling, chopped peanuts or granola
How Much Time Will You Need?
This recipe requires about 30 minutes of active prep time, plus at least 4 hours for chilling the mixture and 24 hours for freezing. In total, you’ll spend about 30 minutes cooking and assembling, with some waiting in between. Don’t worry, it’s worth the wait!
Step-by-Step Instructions:
1. Prepare the Base Mixture:
In a medium saucepan, add the whole milk, heavy cream, granulated sugar, cocoa powder, and salt. Whisk together until the sugar and cocoa are completely dissolved. It’s important for everything to blend well to create a smooth ice cream!
2. Heat the Mixture:
Place the saucepan over medium heat. Stir occasionally, warming the mixture until it reaches around 170°F (77°C) but do not let it boil. Once warm, remove the saucepan from the heat to prevent overheating.
3. Mix in Peanut Butter and Vanilla:
Add the peanut butter and vanilla extract to the warm mixture. Stir until everything is incredibly smooth and well combined. The warmth helps the peanut butter incorporate nicely!
4. Chill the Mixture:
Let the mixture cool down to room temperature. Once cooled, cover it and place it in the refrigerator for at least 4 hours. If you have time, chilling it overnight will produce even better results!
5. Prepare for Freezing:
After the chilling time, pour the chilled mixture into the Ninja Creami pint container, ensuring not to exceed the max fill line. Secure the lid tightly and place it in the freezer.
6. Freeze for 24 Hours:
Let your mixture freeze for a minimum of 24 hours. This step is crucial for getting the perfect texture!
7. Process in the Ninja Creami:
After freezing, take the container from the freezer and insert it into your Ninja Creami machine. Select the “Ice Cream” mode to process it into that creamy goodness!
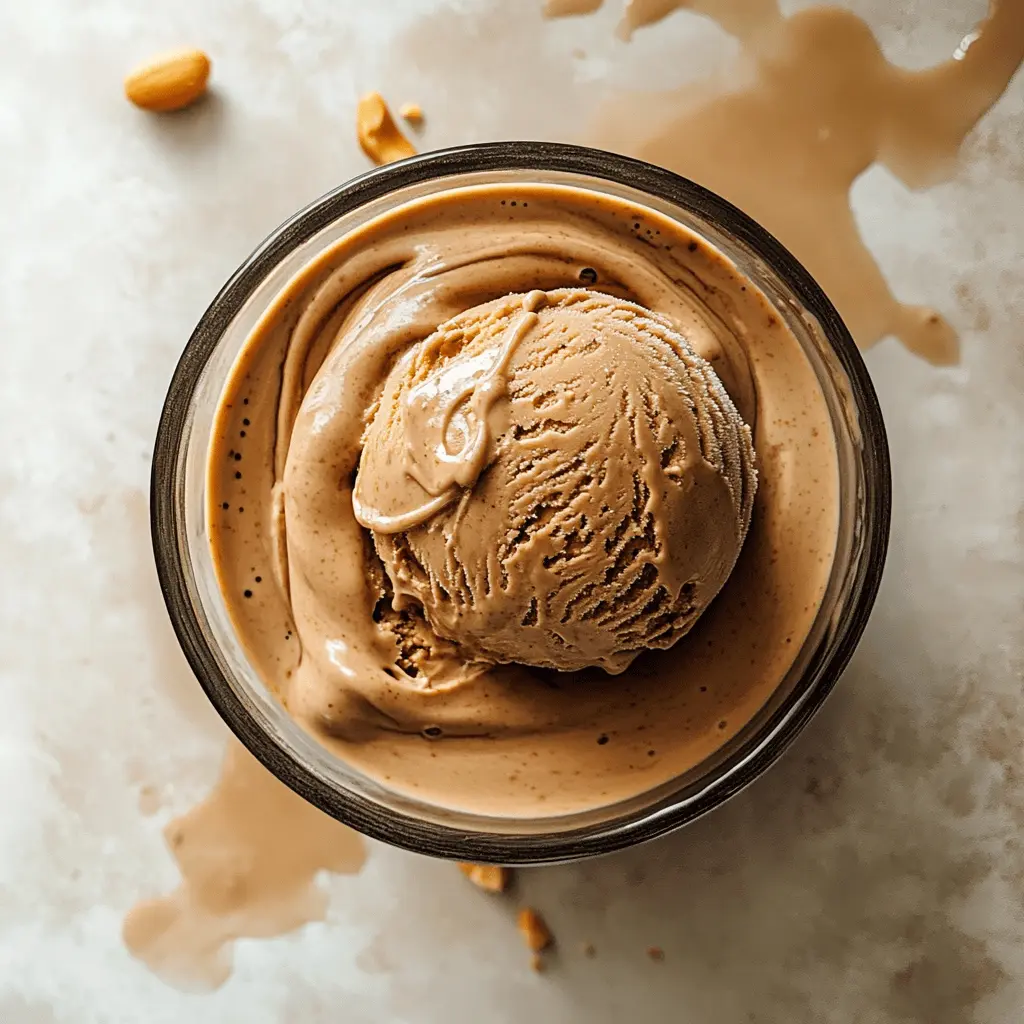
8. Achieve Creamy Texture:
If the ice cream texture is crumbly, simply use the “Re-spin” function once or twice until it’s perfectly creamy and delightful.
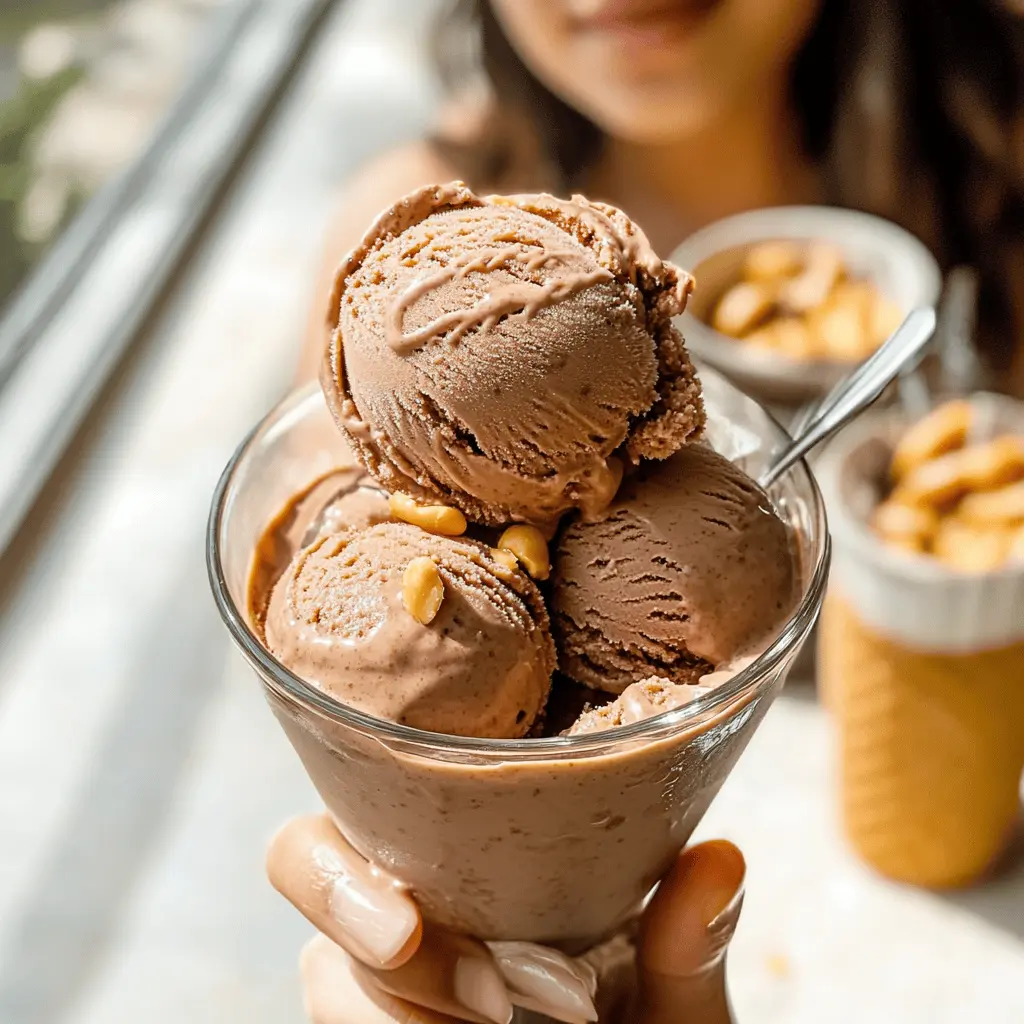
9. Serve and Enjoy:
Scoop the ice cream into bowls. Drizzle with extra peanut butter if desired, and sprinkle with chopped peanuts or granola for a delightful crunch. Enjoy your delicious homemade ice cream!
Now, treat yourself to this rich and creamy chocolate peanut butter ice cream made effortlessly using your Ninja Creami! 🍦
FAQ for Easy Ninja Creami Chocolate Peanut Butter Ice Cream
Can I Use Almond Milk Instead of Whole Milk?
Yes, you can use almond milk instead of whole milk for a dairy-free option. Keep in mind that the texture might be slightly less creamy, so consider adding a bit more heavy cream or a non-dairy cream alternative to achieve a similar richness.
What If I Don’t Have Heavy Cream?
If you don’t have heavy cream, you can substitute it with coconut cream or simply use more whole milk. However, the consistency and creaminess of the ice cream will not be as rich, so it might be a bit icier.
How Can I Store Leftover Ice Cream?
Store any leftover ice cream in an airtight container in the freezer. For best results, press a piece of plastic wrap directly against the surface of the ice cream before sealing the container to minimize ice crystals. It should keep well for about 1-2 weeks.
Can I Add Other Mix-ins to This Recipe?
Absolutely! You can fold in mini chocolate chips, crushed cookies, or chopped nuts after processing the ice cream for added texture and flavor. Just be sure to mix gently so you don’t spoil the creamy consistency!